
Platforms
Game Intro
It is recommended to choose the leftmost campaign (Tutorial Campaign) when starting out, as this map difficulty is most suitable for beginners. Try “Shogun” (Campaign 2) and “Norse Lands” (Campaign 3) after you can clear the main game.
Keyboard Controls
It shouldn’t be necessary to write such a basic tutorial on game controls, but the most annoying thing about this game is that it doesn’t prompt Player 2’s keys, nor does it allow custom key mapping.
Player 1:
| Keyboard | Description |
|---|---|
| A or Arrow Left | Move character left (Double tap to run) |
| D or Arrow Right | Move character right (Double tap to run) |
| S or Arrow Down | Recruit, spend, unlock, upgrade, or drop coins |
| W or Arrow Up | Activate character skill (Dead Lands DLC exclusive) |
| Left SHIFT (Double tap) | Activate mount skill |
| Esc | Pause game |
Player 2:
| Keyboard | Description |
|---|---|
| ~ (Above TAB key) | Enter split-screen mode |
| H, J, K, U | correspond to movement and dropping coins (It’s the shape of Up/Down/Left/Right, the bump on the keyboard corresponds to “Down”) |
| Right SHIFT (Double tap) | Activate mount skill |
Game Flow
| Step | Description | Illustration |
|---|---|---|
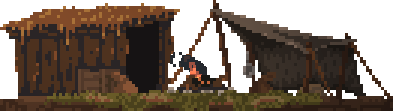
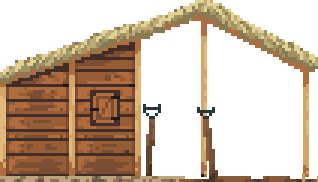
| 1 | Build base, recruit vagrants, chop trees to expand | 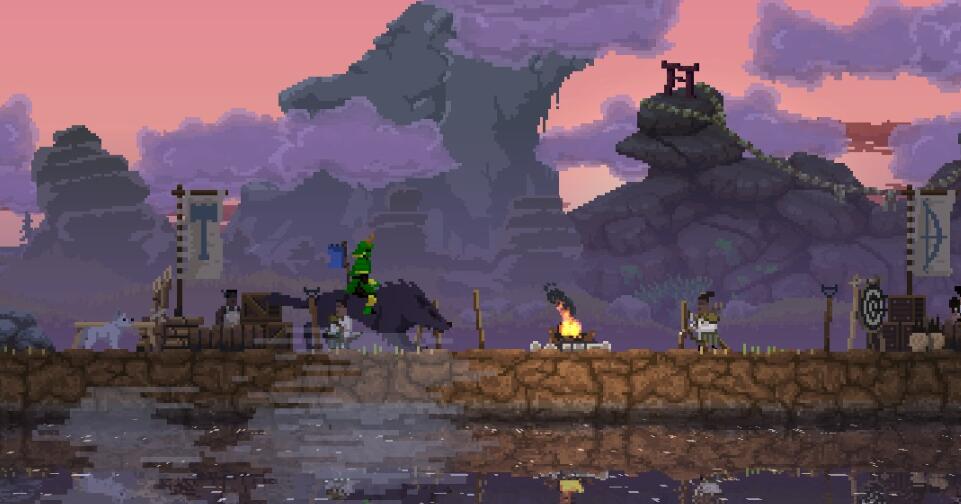 |
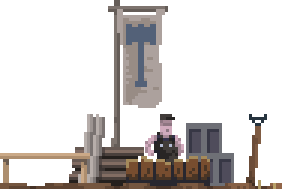
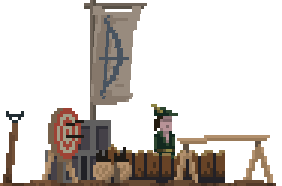
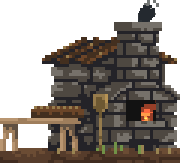
| 2 | Buy bows, hammers, and scythes to equip civilians, upgrade walls, establish defense lines | 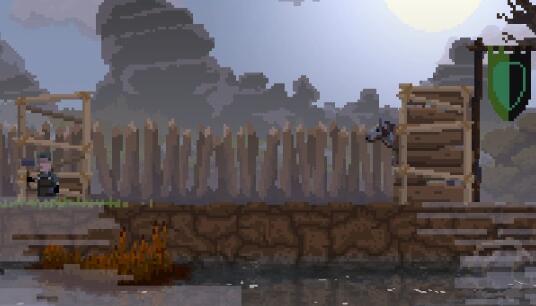 |
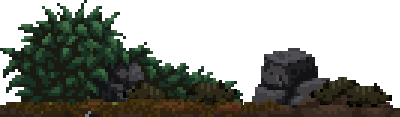
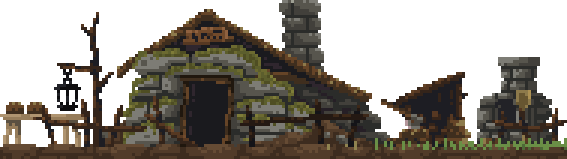
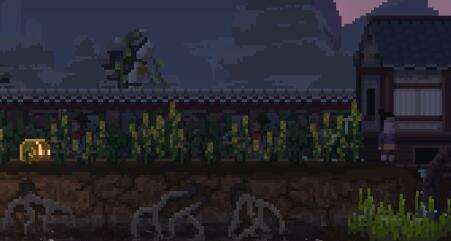
| 3 | Defend against monsters coming at night | 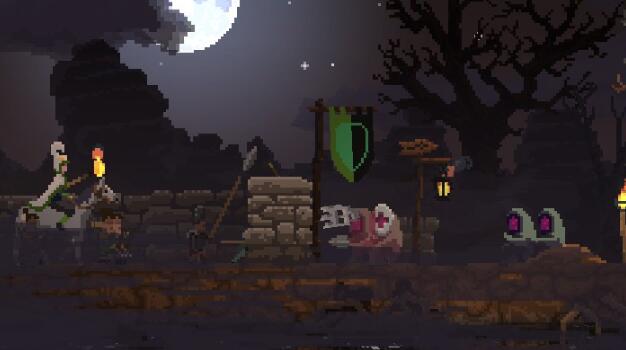 |
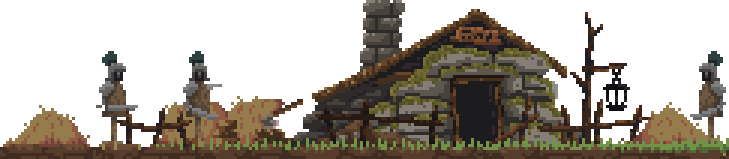
| 4 | Destroy portals, establish your own teleportation points | 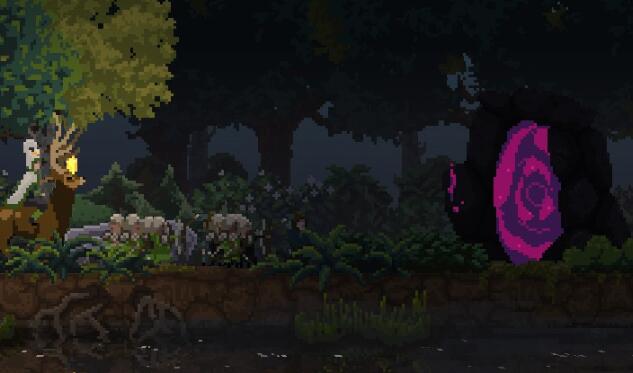 |
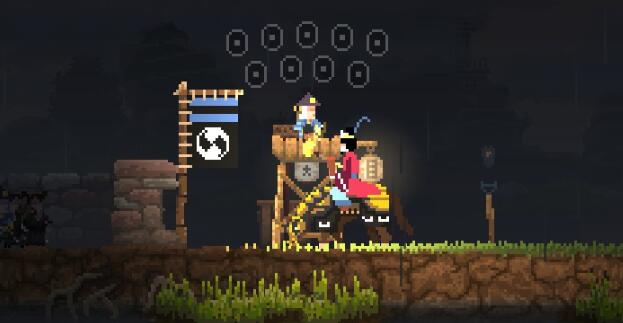
| 5 | Make bombs, lead troops, attack the heart | 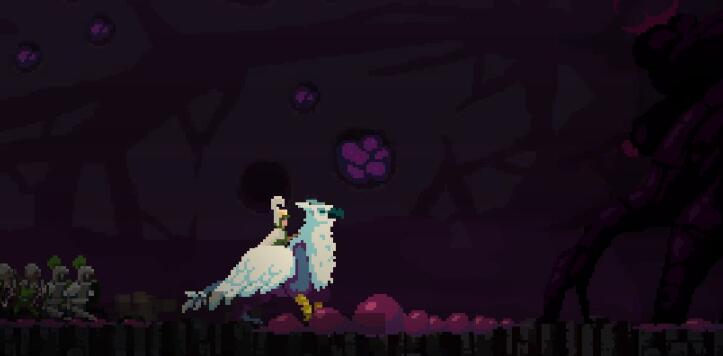 |
Victory Conditions
Destroy all cave hearts on five islands to bring permanent peace to the kingdom.
Defeat Conditions

After being attacked, the player will drop coins and gems from their coin bag. If the coin bag is empty, the crown will be knocked off. If picked up in time, the game continues, otherwise if the crown is snatched by monsters, it is considered a defeat. However, unlike the previous two generations where the save file was directly deleted, this generation will return to the previous island, and all islands will rot to a certain extent, requiring re-purchase of weapons, tools, and equipment for civilians.
Player Characters
Player
- The character controlled by the player.
- You can quickly change the character’s appearance by pressing “S” or the “Down” arrow key on the loading screen after creating a new save.
Ghost of Ancestor

- A soul wandering in the wild. (If the crown was lost before, the soul image will be similar to the previous character)
- Will guide you through game tutorials.
- Waving at you means asking you to follow, and then pointing in a direction means the direction you should go (sometimes it stands on your right and points left, you should go left in this case).
Coin Bag
- The top right of the screen is the coin bag, which can hold gold coins and gems. (Although the bag will display gold, silver, and copper coins, they will all become gold coins when taken out, so coins are collectively referred to as “gold coins”; the same goes for gems, they are all red when taken out)
- Gold coins and gems can slightly exceed the bag’s neck (piling up into a small tip).
- If you continue to fill it when full, it will fall out of the bag onto the ground. Gold coins have a chance of falling into the water (disappearing, cannot be picked up again), gems will definitely fall to the ground.
Residents
Vagrants and Civilians

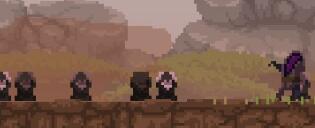
- On the left is a Vagrant. They will crouch and hold their head when small monsters approach. You can recruit them by dropping coins nearby. Vagrants become civilians after picking up gold coins. After becoming civilians, they will immediately run towards home.
- On the right is a Civilian, running slower than monsters chase. Civilians will revert to vagrant status after being hit by small monsters.
- Backpack limit: 2 Gold Coins
Archer

- Occupation after a civilian picks up a bow. Hunts wild animals on the ground at a medium distance outside the wall during the day, returns behind the wall at night.
- Archers will not retreat when encountering danger, making it difficult for them to survive monster swarm attacks.
- Backpack limit: 11 Gold Coins
Worker

- Occupation after a civilian picks up a hammer. Responsible for building, chopping trees, operating catapults, and carrying kegs.
- If there are unfinished construction tasks outside at night, they might go out and die. So it is not recommended to arrange tasks outside the wall near sunset/night (unless safety can be guaranteed).
- Backpack limit: 2 Gold Coins
Farmer
- Occupation after a civilian picks up a scythe. Will farm and plant around the farm. Produces gold coins after crops mature. Works on the farm during the day and returns to the farmhouse or town center at night. Can gather berry bushes in winter to get gold coins.
- Backpack limit: 14 Gold Coins
Pikeman/Ninja

- Occupation after a civilian picks up a pike/ninja sword. Fish for gold during the day. Join defense as combat power at night, but will not attack the cave heart with the troops.
- Pikemen will cause piercing damage behind the wall, which is excellent against small monsters pushing the wall together (if there are multiple pikemen, they will line up during defense to ensure there is only one pike defending at the very front). Ninjas will hide in the nearest bamboo forest (forest in this mode) in front of the wall, and ambush from behind after a certain number of monsters pass. They will throw shurikens from behind to quickly kill ordinary small monsters, and reveal themselves to kill mask monsters and breeders with swords.
- Pikemen and Ninjas have a limit on the number of attacks, and will become civilians after reaching the limit, but they can be re-armed. Especially Ninjas will automatically return to the dojo after reaching the attack limit.
- Backpack limit: 2 Gold Coins
Squire/Ronin

- Occupation after a civilian picks up a shield on the castle, can resist multiple charges from small monsters without losing their armor.
- Will not actively attack in most cases, only slaying incoming monsters when the player issues an attack on a portal or cave.
- Players can give them gold coins to help them withstand more monster charges.
Squire/Roninwill pick up nearby gold coins when their pockets are not full. Squires will not spit out gold coins to the player like archers. - A Squire/Ronin will continuously convert archers into armored archers until carrying 4 armored archers (may result in no archers hunting). These five people are called a squad.
- Backpack limit: 5 Gold Coins
You can
spend 5 gold coinsat the arrow sign next to the outermost wall on both sides to send a squad to attack the portal. Can only send squads on the same side. You can send multiple squads byspending 5 gold coinsagain to increase fault tolerance.
Armored Archer

- Archers who enter a tower or follow a Squire/Knight. Amor can withstand one damage.
- After entering the tower, archers will not leave until devoured by a floater, or knocked out of the tower by a boulder thrown by a Breeder. Archers on the tower still hunt and defend.
- After following a Squire/Knight/Samurai, archers will no longer leave until the Squire/Knight/Samurai loses their armor. Follower archers will not hunt, but will pick up passing coins. Players can stop next to them to take gold coins.
- Backpack limit: 11 Gold Coins
Knight/Samurai

- Occupation promoted from
Squire/Roninafter picking up a sword forged at the forge. - Possesses larger gold capacity, higher block frequency, and stronger knockback resistance.
- After activating the Knight Statue, they will also frequently use weapon jump attacks on small monsters and destroy portals, causing high damage. (Note, knights become very aggressive after activating the Knight Statue, which may cause them to be attacked before retreating in time)
- Larger backpacks and higher block frequency allow them to tank longer than Squires. Generally, a fully buffed squad of knights can clear a small portal solo without the player supervising with coins. Of course, it is recommended to send multiple squads at once and supervise them when the day count is high to avoid the squad being wiped out.
- Backpack limit: 11 Gold Coins
Losing Armor
- Except for armored troops (squires, knights, armored archers), all residents will lose their tools and become civilians after intimate contact with monsters. If they have gold coins in their backpacks, they will scatter all gold coins when the tool drops, and gold coins have a chance of falling into the water. Civilians will become vagrants if attacked again.
- However, vagrants who have been robbed of weapons and identities will stay near the place and can be re-recruited by dropping coins.
Banker

- Stores gold coins thrown by the player into the treasury, and gives extra interest based on the stored amount as days increase. The treasury limit is unknown (but at least 2 bags), you can judge the remaining gold coins in the treasury by observing the height of the gold coin pile at the gate. Stopping next to him will withdraw money from the treasury for you.
- Hides inside the main city gate at night. If the blood moon and attack caused by destroying the portal haven’t ended, the banker won’t come out either.
Merchant
- Comes to the main city to hide every night and provides several gold coins. Players can pay one gold coin during the day to make him continue providing gold coins at night. Only appears on Island 1 and Island 2, a stable and considerable source of income in the early stage.
- Will not be attacked by monsters.
Monsters and Portals
Night Raid
- Every night, the portals nearest to the main city on both sides will activate and spawn small monsters. The target of the small monsters is the player’s crown and all civilians recruited by the player. The number of small monsters is determined by the player’s survival days. At first, there are fewer monsters and low intensity; as the days increase, not only does the number of monsters increase, but powerful monsters like Breeders and Floaters also appear, putting walls and troops to a severe test.
- Walls and archers complement each other. The former prevents monsters from colliding with archers, while the latter can eliminate monsters before the wall is pushed down. Catapults are also the best weapons against large numbers of monsters. Combined with the continuous damage from fire barrels, even Armored Breeders will burn to death in front of the wall.
- However, as the player’s survival days accumulate further, the night offensive will become stronger and stronger. Eventually, there will be a night when your troops and walls cannot withstand the monster’s offensive. Therefore, destroy the cave before the tragedy occurs to bring permanent peace to the island. However, if the player loses the crown, the difficulty will be calculated from 0. Therefore, players can reduce the difficulty accumulation caused by excessively long survival days by having the crown taken away.
Greedling

- Attacks by jumping forward and colliding.
- Will steal gems and the dog!
- Movement speed varies in different campaigns and challenge modes, but is generally fast and very fragile itself. The target is the player’s crown, but if it encounters walls and civilians on the way, it will also destroy walls or cause civilians to lose armor through collision, and snatch weapons, tools, or gold coins. It will also snatch wooden pieces not yet installed on the ship. Once an item is snatched, it will immediately retreat to the portal or cave.
Masked Greedling

- Small monsters wearing masks. Masks can withstand several arrow attacks. Behavioral logic is the same as ordinary greedlings.
Breeder

- Attacks with fists. Area damage. Occasionally picks up stones and throws them, causing high area damage to units in towers and behind walls (frequency varies with difficulty). But throwing accuracy is worse than catapults.
- Very good at destroying walls.
- Can spawn several small monsters every once in a while, deciding whether to spawn ordinary greedlings or masked greedlings based on current difficulty. Breeders have extremely high health and can survive direct hits from catapults.
Floater
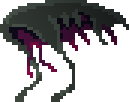
- Can fly in the sky, uses grab attacks.
- The only monster that does not aim to seize the player’s crown, and the only monster that flies in the sky. It prioritizes capturing and devouring tower archers. Only by killing the floater can the devoured residents be rescued.
- Floaters have average defense and are hard to survive under dense arrow rain. Sometimes lucky catapults will hit them.
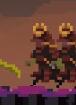
Armored Breeder
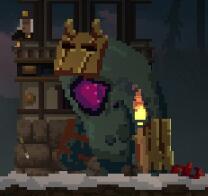
- The strongest monster that can withstand several catapult attacks. Sometimes a Crown Stealer sits on top of its head.
Crown Stealer

- Dash attack.
- Can jump directly over walls.
- Defense is about the same as masked greedlings.
- The only monster that does not attack civilians, its only goal is the player’s crown. When the stealer approaches the player (slightly larger than player vision), its movement speed will increase significantly, and no mount can outrun it.
Parasite

- Exclusive to Plague Island mode. Monsters created after being touched by monsters. Have the defense of mask monsters and can climb walls.
Portal
- Activates in the evening or when attacked. No longer spawns small monsters after the cave is completely destroyed. After destruction, you can build your own portal.
Blood Moon
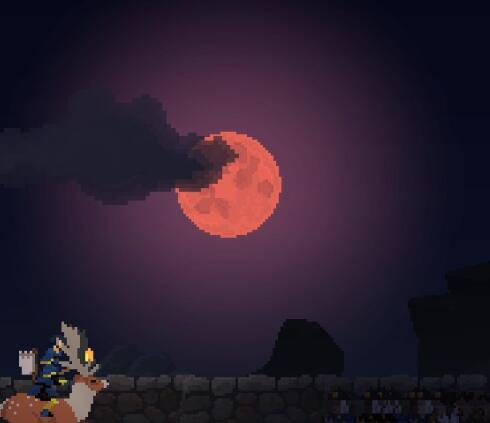
- Blood moons are divided into natural blood moons and retaliation blood moons.
- The former appears about every seven days (pay attention to the background moon phase, a full moon is a blood moon). Difficulty is determined by the player’s total survival days. The number of monsters at night during the blood moon will be greater than usual, and monster intensity will also increase (powerful large monsters not usually seen will appear).
- Retaliation blood moon is triggered by destroying a portal. Destroying a portal will cause forced entry into blood moon state during the day. At this time, archers do not hunt, and farmers cannot farm. Retaliation blood moon, like ordinary full moon, will have more monsters than usual. Unlike normal full moon, if the player does not eliminate all monsters, the retaliation full moon cannot end.
- The day after the blood moon ends is a peaceful night with no monster attacks. You can seize the opportunity to expand.
Dock Portal
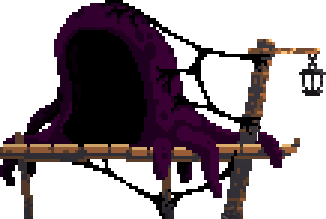
- Will attack players and Squires/Knights within close range. Attacks have high damage and knockback effects, but cannot move itself. Can knock off the player’s crown but will not directly snatch it (useful for farming achievements). No longer spawns small monsters after the cave is completely destroyed, but will still attack. After destruction, you can build your own portal.
Build Your Own Portal
- On the left is the portal ruins, left after destroying a portal or dock portal.
- After unlocking stone technology, you can spend 8 gold coins at the ruins to build a portal. This will send 2 workers to build it.
- Spend 2 gold coins to teleport at the portal. This gives you 15 seconds to choose. Hold “Left” or “Right” to move the view to select the destination, press “Down” to confirm teleportation (you can teleport to wherever you can see).
- If teleported to a large enough open space, a paired extra portal ruin will be generated under your feet, but it will disappear after 30 seconds. Spending 8 gold coins at this ruin will build a permanently bound portal. Thereafter, spending 2 gold coins at one portal will teleport to the bound other portal without cooldown.
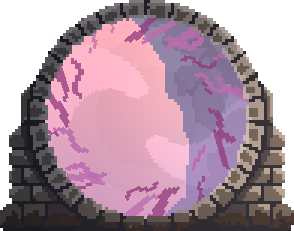
Cave
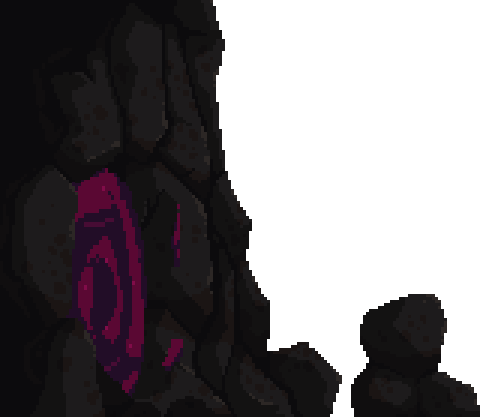
- Function is the same as a portal, but automatically restores within 4 days after destruction. Only by carrying a bomb can you enter the cave and destroy it permanently.
Destroy Cave
- The cave on the mountain (large portal) can be destroyed. It won’t spawn monsters for a while after destruction, but will restore after 4 days. Therefore, to completely destroy the cave and liberate the current island, you must upgrade the castle to the highest level and make a bomb. Spend money and carry the bomb to enter the cave.
- Inside the cave, players will encounter the number of hives corresponding to the island number (for example, there are four hives inside the cave of Island 4). Hives will continuously spawn monsters to block players from approaching the core.
- Greed Nest. When the player reaches the Greed Nest, you can spend gold coins to light the bomb and completely destroy the cave. Remember to return to the exit and leave the cave in time.
- The depth of the cave is determined by the length of the island. At Island 5, the cave is the deepest, and there are more hives blocking the player’s advance. Therefore, players need to bring enough money to replenish defense for Squires when going deep into the cave, and reduce attack resistance by dropping coins when there are too many monsters.
- Gryphon is the best mount for going deep into the cave. The wing flapping knockback skill can play a role similar to dropping money, and its super long stamina can escape the cave before the explosion.
Hive
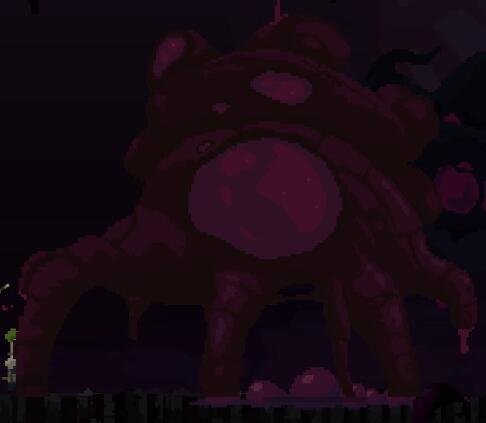
- Life forms in the cave used to stop the player from advancing. Spawns a batch of small monsters below every once in a while.
Greed Nest

- The core of the cave. Spawns a batch of small monsters on the other side of the player every once in a while. Spend gold coins to light the bomb to destroy the nest, thereby permanently destroying the cave.
Parasite Monolith

- Exclusive to Plague Island mode. Invincible. Will knock up all targets trying to approach, preventing players and residents from passing through.
Tech and Wild Elements
Tech
- Tech is used to unlock building upgrades.
- There are three levels of tech in this work: Wood (Initial Tech), Stone, and Iron.
Stone Mine
![]()
- Located in the wild of Island 2
- Price: 20 Gold Coins
- Unlocks Stone Tech
- At this time unlocks Level 5 Base (allows you to recruit Squires), generates Pike Shop and Catapult Station inside the boundary walls on both sides (if there is space).
- Tech upgrade does not require workers to go.
Iron Mine
![]()
- Located in the wild of Island 4
- Price: 20 Gold Coins
- Unlocks Iron Tech
- Further unlocks Level 7 Base upgrade (allows you to build bombs), unlocks Level 5 wall (Iron Wall). After you build an iron wall, a forge will be generated inside the iron wall (upgrade a wall to iron wall within your territory).
- You can buy iron swords for 12 gold coins at the forge. Each iron sword can upgrade a Squire to a Knight.
- Tech upgrade does not require workers to go.
Natural Elements
Coin Chest
![]()
- When the player passes slowly, the coin chest will open automatically and spit out about half a bag of gold coins.
- Players can run past the coin chest quickly to avoid opening it, keeping the coins safely in the chest.
- Coin chests spawn at random locations in the forest of each island, but the number spawned on each island is predetermined.
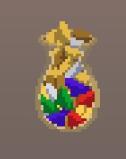
Gem Chest

- The only way to get gems (except bank storage).
- When the player passes slowly, the gem chest will open automatically and spit out about 2-4 gems.
- Players can run past the gem chest quickly to avoid opening it, keeping the gems safely in the chest.
- Gem chests spawn at random locations in the forest of each island, but the number spawned on each island is predetermined. Therefore, the number of gems in a save file is limited, unlike gold coins which can regenerate infinitely. But there are enough to unlock everything. Just make sure gems are not stolen by small monsters.
Tree
-
Trees make up the forest, which can be distinguished by whether the background is full of trees.
-
You can spend 1 gold coin to mark trees at the edge of the forest. After marking, workers will go to chop trees (mark carefully in the evening or at night, as workers may be attacked by monsters before they can return). Chopping trees can get 1 to 2 gold coins.
-
Forests are not necessarily continuous. If there is a large clearing in the middle of the forest, you may be able to start chopping trees from the middle.
-
Chopping down forests can provide more open space. Space for grass to grow outside the wall (increasing rabbit spawn rate), and also beneficial for farm generation or portal construction.
-
Also, for most mounts, open ground is easier to run on than forest.
-
But be careful! Deforestation also has its downsides.
-
Deer spawn rates will decrease (deer only spawn in forests). And the further away from the base, the more dangerous it is for your workers.
-
Cutting down trees right next to both sides of a vagrant camp or merchant hut will permanently destroy them. (Destroyed vagrant camps remain for about a day. You can build a Citizen House on its ruins during this time, otherwise the ruins will disappear.)
Tall Grass
Spawning point for rabbits. Only spawns on grass outside the walls. Therefore, if you want to maximize archers’ hunting efficiency, it is recommended to leave enough open space outside the walls. Disappears in winter.
Vagrant Camp

Written as “Beggar Camp” in achievements
- Main source of civilians.
- Spawns about 2-3 vagrants per day, but a vagrant camp can only hold two vagrants at a time.
- Drop coins next to vagrants to recruit them into civilians. Each vagrant requires 1 gold coin.
Note: Destroying any tree closest to both sides of the vagrant camp will cause the vagrant camp to become ruins (try not to do this unless you have thought it through). Destroyed vagrant camps remain for about a day. You can build a Citizen House on its ruins during this time, otherwise the ruins will disappear.
Citizen House
- Can only be built on the ruins of a vagrant camp.
- Construction Price: 8 Gold Coins
- Spawns about 2-3 unrecruited civilians per day. A Citizen House can accommodate three unrecruited civilians at the same time. Unrecruited civilians will not be attacked by monsters.
- Recruitment Price: 5 Gold Coins
- Review: Whether it’s price or portability (vagrants can be attracted by bakeries), it’s not as good as a vagrant camp. Can only serve as a remedy for vagrant camps destroyed due to territory expansion.
Merchant Hut
- Only appears on Island 1 and Island 2.
- After getting 1 gold coin, the merchant will go there to rest, and go to the base center in the evening.
- Merchants will not be attacked by monsters.
Note: Destroying any tree closest to both sides of the merchant hut will cause the merchant hut to disappear, thus causing the merchant to disappear. Cannot be remedied. (Try not to do this unless you have thought it through).
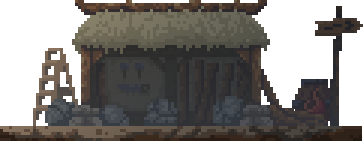
Mound
![]()
- Level 0 Wall (Walls can only be built from mounds)
- See “Buildings” section, “Wall” part for wall level info.
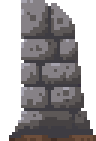
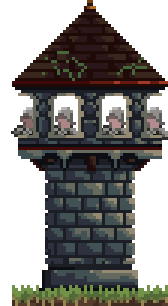
Stone

- Level 0 Tower (Towers can only be built from stones)
- See “Buildings” section, “Tower” part for tower level info.
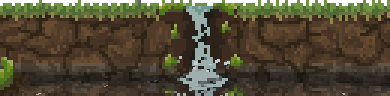
Small Waterfall
- Level 0 Farm (Farms can only be built from small waterfalls)
- See “Buildings” section, “Farm” part for farm level info.
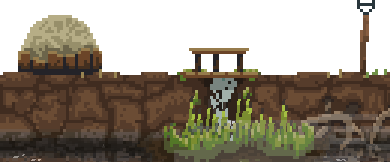
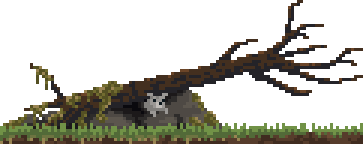
Fallen Tree

- See “Dog” part in “Animals and Mounts” section.
Berry Bush

- Only spawns on open ground in winter (low spawn density).
- Consists of four small berry bushes.
- When blue berries grow on it (regrows every day), you can spend 1 gold coin to send farmers to collect. Each small berry bush can provide about 3-4 gold coins.
Boar Den
- Only spawns in winter forests. Only one spawns per winter.
- Active piglets can be observed around (cannot interact).
- Staying or walking slowly past will spawn a large boar (see “Boar” part in “Animals and Mounts” section). Boars are aggressive.
Seasons
The game has a four-season cycle system, one season is 16 days.
| Year | Spring | Summer | Autumn | Winter |
|---|---|---|---|---|
| 1 | 1-16 | 17-32 | 33-48 | 49-64 |
| 2 | 65-80 | 81-95 | 97-112 | 113-128 |
| 3 | 129-144 | 145-160 | 161-176 | 177-192 |
| 4 | 193-208 | 209-224 | 225-240 | 241-256 |
| 5 | 257-272 | 273-288 | 289-304 | 305-320 |
Spring
The first day of every save is the first day of spring. In spring, grass will grow out of nowhere on land without trees. Before winter arrives, grass can spread in continuous areas (not cut off by bridges, forests). Rabbits and deer start to spawn, and farms can start to be used for production.
Summer
Except for appearance, the only difference from spring is that grass can no longer grow out of nowhere, but can only spread from existing continuous grass areas.
Autumn
In appearance, the grass turns yellow, and there will be floating ice on the water surface near the end of autumn. Other parts are the same as summer.
Winter
Tip: It is hard to have income during this time. It is recommended to speedrun to Island 4 to unlock iron tech in the early stage, and return to previous islands to develop and blow up caves in winter.
It starts to snow, grass disappears, and farms stop production (crops not yet mature at this time will wither). Rabbits and deer stop spawning. But berry bushes start to spawn in the wild, you can spend 1 gold coin at the berry bush to let farmers pick berries to produce gold coins. At the same time, a boar den appears in the wild, refreshing a powerful hostile creature, the boar. Killing the boar awards about 30 gold coins. Only one boar spawns per winter.
Buildings
Note: Level 0 indicates initial state.
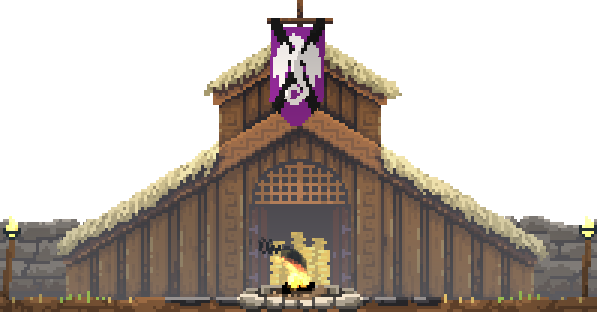
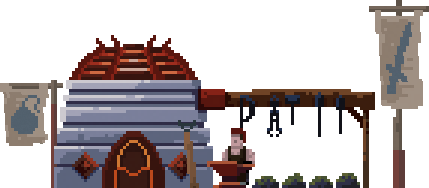
Base Center
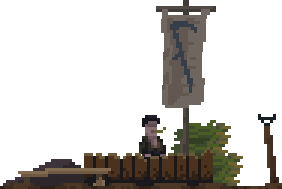
Level 0

- Located in the exact center of the island.
- Every time you go to a new island, there must be two vagrants nearby, and there must be two level 0 walls and two level 0 towers at a fixed distance on both sides nearby.
Level 1

- Price: 3 Gold Coins
- Tech: Wood (Initial Tech)
- Lights a campfire, and a shop is generated on each side of the fire.
Hammer Shop
- To the left of the fire is the Hammer Shop.
- Hammer unit price: 3 Gold Coins; The shop can store up to 4 hammers.
- Civilians can pick up hammers to become workers.
Bow Shop
- To the right of the fire is the Bow Shop.
- Bow unit price: 2 Gold Coins; The shop can store up to 4 bows.
- Civilians can pick up bows to become archers.
Scythe Shop
- When you build a second wall on the same side, a Scythe Shop will be generated in the open space behind the wall.
- Scythe unit price: 4 Gold Coins; The shop can store up to 4 scythes.
- Civilians can pick up scythes to become farmers.
Level 2
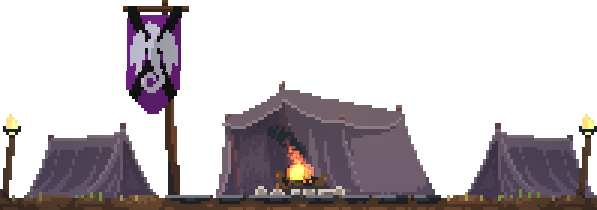
- Price: 6 Gold Coins
- Three tents are set up around the fire, no other changes except appearance.
Level 3
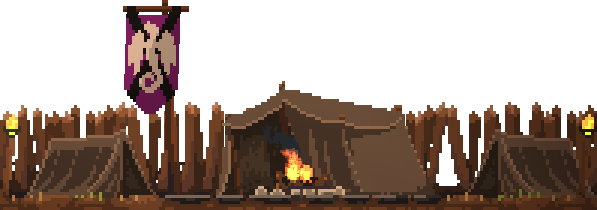
- Price: 9 Gold Coins
- Wooden walls rise in the base background. If the innermost wall hasn’t been built yet, you can get a free Level 1 wall on the innermost side of both sides. (Related to achievement “On the Second Day”, see achievement area for details)
Level 4
- Price: 12 Gold Coins
- Spawns a Banker. See the “Residents” section above for Banker introduction.
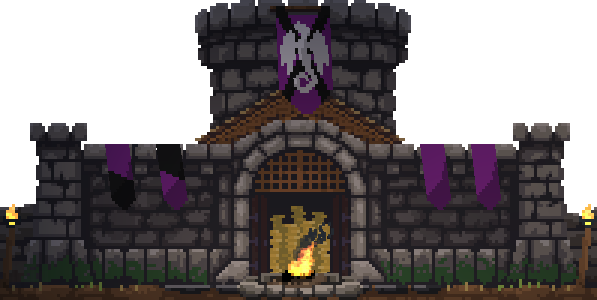
Level 5
- Price: 15 Gold Coins
- Tech: Stone (Tech unlocked in Island 2 wild)
- Stone walls rise in the base background. Free upgrade to Level 3 wall and Level 2 tower on the innermost side of both sides. Generates Pike Shop and Catapult Station inside the boundary walls on both sides (if there is space).
Pike Shop

- When you build a second wall on one side, a Pike Shop will be generated in the open space behind the outermost wall.
- Pike unit price: 2 Gold Coins; The shop can store up to 4 pikes.
- Civilians can pick up pikes to become pikemen.
Catapult Station
- When you build a second wall on one side, a Catapult Station will be generated in the open space behind the outermost wall.
- Spend 6 gold coins to build a catapult, 2 workers will push it to the frontline on that side. Two workers will operate it every night. Defense sharp weapon.
- You can spend 5 gold coins at the red barrel of the Catapult Station to buy a Fire Barrel (5 gold coins can only buy one, consumable). Workers will push the fire barrel to the frontline to replace the stone as catapult ammo. You can buy multiple fire barrels (no stacking limit), although expensive, they are very powerful.
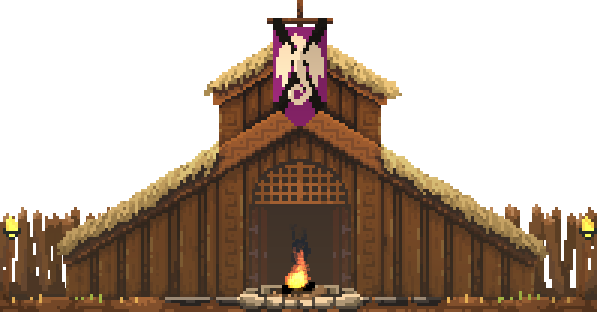
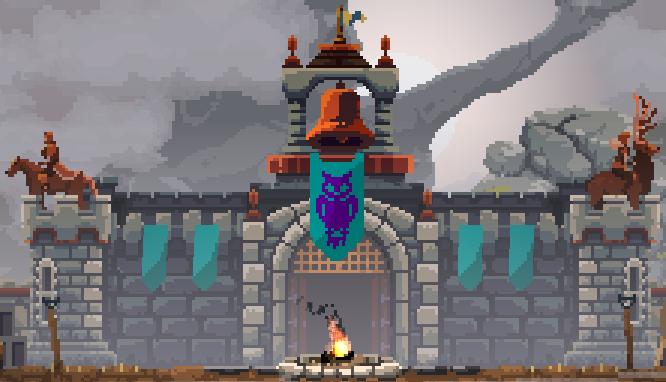
Level 6
- Price: 18 Gold Coins
- Build a castle in the center of your island, and allows you to buy up to 4 shields, each shield costs 4 gold coins (shields are used to spawn “Squires”, see “Residents” section above). This upgrade will also generate a Gem Keeper near the dock.
Level 7
- Price: 20 Gold Coins
- Tech: Iron (Tech unlocked in Island 4 wild)
- This upgrade will upgrade your castle with iron, free upgrade to Level 5 wall and Level 5 tower on the innermost side of both sides.
- This upgrade also adds a bomb banner on the castle side facing the cave portal. Spend 18 gold coins at this banner to build a bomb, spend another 5 gold coins to march to the cave. Spend 5 gold coins at the cave entrance to enter the cave. Spend 5 gold coins at the Greed Nest to light the bomb, which will completely destroy the island’s cave (stop spawning monsters), bringing permanent peace to the island.
Forge
- Generated in a large enough open space behind the Iron Wall.
- Sword unit price: 12 Gold Coins; The forge can store up to 4 swords.
- Squires can pick up swords to upgrade to Knights.
Wall
- Walls are used to block monsters (cannot block Floaters and Crown Stealers), and also hinder the spread of grass and farmland.
- When night comes, defense troops will gather behind the wall for defense.
- Generally speaking, only the outermost wall is useful (troops cannot retreat too far safely when the wall is destroyed). Therefore, it is generally recommended to upgrade the outermost wall to the highest level you can.
- You can observe wall health by appearance. Workers will repair undestroyed walls during the day.
- Destroyed walls can be repaired by spending gold coins, without resetting the level.
- When a new wall is built on the outermost side, it will attract the defense squad on that side to move forward.
- Upgrading walls count as disappearing, cannot block monsters, nor attract defense troops and catapults. When the outermost wall upgrades, defense troops will retreat.
- When the new wall is built too far, since defense troops (especially catapults move very slow) may not arrive in time, the wall may be destroyed, leaving your defense troops to face enemies without a wall. Therefore, please carefully arrange wall upgrades or new walls near night.
Level 0 - Mound
![]()
- Except for the innermost 4 mounds, other mounds are randomly generated.
- Walls can only be built on mounds.
- Mounds cannot block monsters.
Level 1 - Barricade

- Price: 1 Gold Coin
- Tech: Wood (Initial Tech)
- Rebuild Price: 1 Gold Coin
- Very fragile, can only handle a few attacks.
Level 2 - Wood Wall
- Price: 3 Gold Coins
- Rebuild Price: 2 Gold Coins
- Enough to survive the first few nights, but also fragile in late game or blood nights.
Level 3 - Low Stone Wall

- Price: 5 Gold Coins
- Tech: Stone
- Rebuild Price: 3 Gold Coins
- Has relatively high health. Enough to handle blood nights without Breeders in the early stage.
Level 4 - High Stone Wall
- Price: 8 Gold Coins
- Rebuild Price: 5 Gold Coins
- Has extremely high health. Unless there are two or more Breeders or severely insufficient archers, it is difficult to break. Raised walls allow archers to attack in a larger arc.
Level 5 - Iron Wall

- Price: 12 Gold Coins
- Tech: Iron
- Rebuild Price: 6 Gold Coins
- The highest level wall. Has the most health, small monster attacks seem like tickling it.
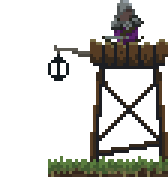
Tower
- Towers are defensive buildings for archers to station.
- When there are extra places on the tower, random archers will be assigned to that tower. (Towers outside the boundary will be filled, towers within two layers inside/outside boundary will be filled)
- If they can hit, archers on the tower will hunt animals, but will not come down to pick up money.
- Stationed archers will stay up there until knocked down by monsters that can hit them.
Level 0 - Stone

- Except for the innermost 4 stones, other stones are randomly generated.
- Towers can only be built on stones.
- Stones will not have archers go up before upgrading to towers.
Level 1 - Low Tower
- Price: 3 Gold Coins
- Tech: Wood
- Monsters other than Floaters will not actively attack archers on the tower, but may knock archers down when attacking troops under the tower.
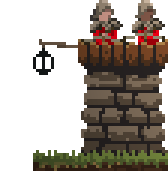
Level 2 - Single Uncovered Tower
- Price: 6 Gold Coins
- Tech: Wood
- The arrow platform is higher, so it is less likely to be attacked by monsters, and also has better shooting field of view.
Level 3 - Double Uncovered Tower
- Price: 9 Gold Coins
- Tech: Stone
- Can hold two people, thus having double firepower.
Level 4 - Triple Uncovered Tower
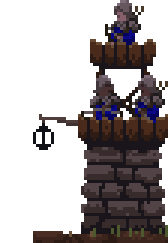
- Price: 12 Gold Coins
- Tech: Stone
- Added a higher shooting position on the basis of level 3. Has stronger firepower. But still vulnerable to Floater attacks so far.
Level 5 - Triple Covered Tower
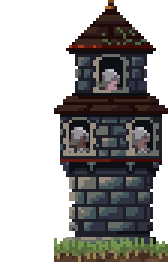
- Price: 15 Gold Coins
- Tech: Iron
- Having a cover makes it difficult for archers above to be attacked by Floaters.
Level 6 - Quadruple Covered Tower
- Price: 18 Gold Coins
- Tech: Iron
- Added a shooting position, and raised all shooting positions to the highest. Has powerful firepower when full.
Farm
- Farmers with scythes can farm on it to produce gold coins.
- When there are enough farmers working, farmland will spread like grass and can grow a large piece. Will be blocked by walls and bridges.
- With enough space on both sides, the single farm farmer limit is about 6.
- In winter, crops wither, and after farmers are attacked, corresponding fields will also wither if not tended to in time.
Level 0 - Small Waterfall
- Can spend gold coins to build fields here. Requires no trees above and nearby.
Level 1 - Field
- Price: 3 Gold Coins
- Farmers working here will return to the base center near sunset and return at sunrise.
- Usually keeps your farmers safe, but the cost is that farms far from the base grow slowly.
Level 2 - Farmhouse
- Price: 8 Gold Coins
- Farmers working here will stay near the farmhouse at night. Unless monsters approach (of course, it’s usually too late to run when discovering monsters).
- Allows farmers not to run far back to the base center, so they have more time to tend the fields and produce gold coins faster.
- Recommended to protect with walls in the distance to avoid losing farmers.
Animals
Dog
![]()
- Trapped by a fallen tree on Island 2, if the player drops a gold coin on the tree, the dog will be freed.
- Will follow the player who rescued it. Fast movement speed.
- Will bark in the direction where monsters appear, will howl when blood moon comes.
- Cannot be teleported with you.
- There is only one per save. Note that it will be carried away by small monsters! So please pay attention to safety. If carried away, it can also be rescued by blowing up the island’s cave.
Rabbit/Raccoon/Chicken
- Spawns from tall grass during non-winter seasons, moves slowly, will not run away because of player approach, archers will target them for hunting during the day, each providing 1 gold coin.
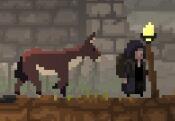
Deer
![]()
- Spawns from forests during non-winter seasons.
- Will run in the opposite direction when encountering players passing by. Players can drive them, but deer will only run in the same direction twice in a short time.
- Deer can withstand 3 attacks, awards 3 gold coins after killing.
Fish

- Appears when Pikemen or Ninjas fish during the day, each providing 1 gold coin. Exists even in winter.
Boar
![]()
- Spawns in boar dens in forests in winter. There will be some piglets around the spawn location. If the player stays or walks slowly past, the boar will appear from the boar den and charge at the player, causing high damage.
- Can be lured to the wall, it will hit the wall and enter a stunned state.
- Can withstand a dozen arrow attacks. Killing a boar awards about 30 gold coins (more than half a bag).
- Only one per winter.
Hermits
- Hermits are unlocked at hermit huts in the wild.
- After unlocking, spend 1 gold coin to take them along, take them to upgradeable buildings and spend gold coins to upgrade buildings.
- When hermits are not needed, you can shake them off by pressing “Left” and “Right” repeatedly and quickly.
- Note that when carrying a hermit, the hermit will be directly carried away if attacked by monsters.
- Hermits will also be directly carried away if attacked.
- Hermits carried away can be rescued by blowing up the island’s cave.
Ballista Hermit

- Unlock Location: Island 1
- Unlock Price: 3 Gems
Can convert towers into ballistas. Ballistas have high piercing damage, but need Workers to load. Each ballista can accommodate up to two workers to operate.
- Building conversion requirement: Level 4+ Tower (Triple Uncovered Tower and above)
- Building conversion cost: 15 or 18 Gold Coins
Stable Hermit

- Unlock Location: Island 2
- Unlock Price: 1 Gem
Can convert farmhouses into stables. Stables do not affect the original function of farmhouses except for appearance changes. At the same time, all previously unlocked mounts will be summoned to gather here, and you can spend 3 gold coins to switch mounts here.
- Building conversion requirement: Level 2 Farm (Farmhouse)
- Building conversion cost: 8 Gold Coins
Baker Hermit

- Unlock Location: Island 3
- Unlock Price: 4 Gems
Can convert towers into bakeries (no defense capability). You can make bread by spending 4 gold coins at the bakery, the bakery bread capacity is 4. Bread will attract all vagrants on the island to move towards the bakery. Upon reaching the bread, vagrants will eat the bread and become civilians. To save money, you can drop money to recruit the vagrant before he reaches the bread.
- Building conversion requirement: Level 4+ Tower (Triple Uncovered Tower and above)
- Building conversion cost: 15 or 18 Gold Coins
Knight Hermit

- Unlock Location: Island 4
- Unlock Price: 2 Gems
Can convert towers into Squire towers. Spend gold coins at Squire towers to forge armor (each tower can only convert one squire at a time), civilians will equip armor and become Squires. Squire towers have defense capability equivalent to a Level 3 Tower (Double Uncovered Tower).
- Building conversion requirement: Level 4+ Tower (Triple Uncovered Tower and above)
- Building conversion cost: 15 or 18 Gold Coins
Horn Hermit

- Unlock Location: Island 5
- Unlock Price: 3 Gems
Can convert high stone walls or iron walls into horn walls. After blowing, troops from the other side will come to support, the support effect lasts all night.
- Building conversion requirement: Level 4+ Wall (High Stone Wall and above)
- Building conversion cost: 12 or 16 Gold Coins
Statues
- Statues in this game require gems to unlock first, then gold coins to activate.
- Receive the statue’s buff effect after activating with gold coins.
- Buff effects persist even after coming back to the island. Buff effects last until all player crowns are taken.
- After crowns are taken, you only need to spend gold coins to reactivate at the statue, no need to spend gems again.
Archer Statue

Most recommended statue to activate. Can greatly
increase archer defense efficiency and hunting efficiency.
- Unlock Location: Island 1 Wild
- Unlock Cost: 4 Gems
- Activation Cost: 10 Gold Coins
- Buff Effect: Gives your archers perfect aim. (Archer hit rate is about 50% without buff)
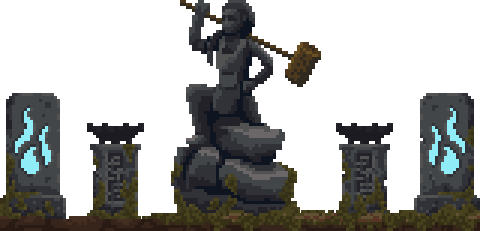
Farmer Statue
Third recommended statue to activate. This statue can make farmers more concentrated when there are enough farmers, making it easier to collect gold coins.
- Unlock Location: Island 2 Wild
- Unlock Cost: 1 Gem
- Activation Cost: 7 Gold Coins
- Buff Effect: Increases the maximum number of farmers for all farms by 2.
Builder Statue
Second recommended statue to activate. Allows walls to last longer, very helpful when defending against night raids. When this statue is active, if walls are damaged, workers can repair walls back to the upgraded maximum health.
- Unlock Location: Island 3 Wild
- Unlock Cost: 3 Gems
- Activation Cost: 9 Gold Coins
- Buff Effect: Increases maximum wall health. When wall health exceeds normal maximum health, the wall will release white particles from the bottom, which can be used to judge whether the wall’s extra health is exhausted.
Knight Statue
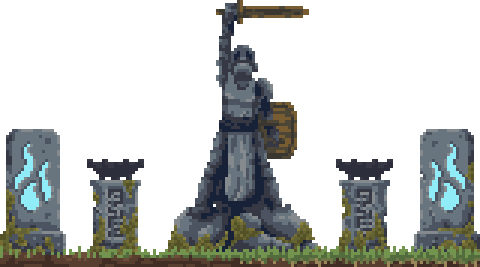
Not very recommended to activate. Can increase Knight output efficiency, but they are easily attacked when walking back, making them die faster. Compared to the pure buffs of other statues, this is more like a double-edged sword. Useful against small-scale enemy forces, but consider carefully when enemy numbers increase later.
- Unlock Location: Island 5 Wild
- Unlock Cost: 2 Gems
- Activation Cost: 9 Gold Coins
- Buff Effect: Gives your Knights (note not Squires) a jump slash ability. They jump forward and stab with their sword during combat, causing damage to any enemies they contact. They will also do this when defending against night raids, jump slashing from behind the wall to damage enemies, then retreating behind the wall.
Dock
Boat Wreck
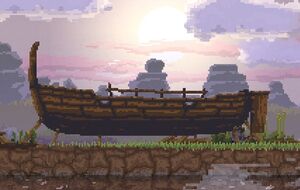
- When you reach an island without a lighthouse, the boat will be smashed into a wreck after you land. You need to repair it to sail to another island.
- The wreck can be found somewhere near where you landed. You can spend 10 gold coins at the wreck to turn it into a boat frame. After the boat frame is generated, a certain amount of wooden pieces will be generated, and up to 3 workers will assemble the wooden pieces onto the boat frame at the same time. Note that monsters can steal wooden pieces just like stealing gold coins (in which case you need to spend gold coins to replenish wooden pieces). So try to repair the wreck at sunrise, or build walls outside the wreck.
- Island 1 generates enough wooden pieces when the boat frame is generated. Other islands require you to buy extra wooden pieces at the boat frame. The further the island, the more extra wooden pieces are needed. Each wooden piece costs 2 gold coins.
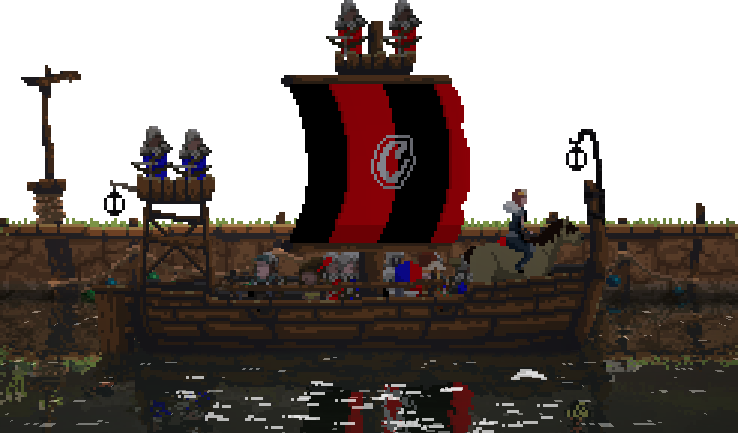
- When the boat on the frame is assembled, the player can spend 2 gold coins here to push the boat into the water. At this time, 3 random workers will quickly push the boat to the nearby dock.
- Once in the water, 4 archers will be assigned to guard the boat’s watchtower (similar to two Level 2 towers).
- After that, you can use the dock bell to call troops and workers to board the ship.
- If the player wishes to leave the island, all players (in co-op mode) must be at the dock, and the player must spend 10 gold coins at the boat to set sail. When setting sail, all monarchs will board the ship, and dogs and hermits not taken away on the island will also automatically board after setting sail.
- If the current island is the furthest island you have reached, the next island will be unlocked. Then Player 1 can press “Left” or “Right” to choose the destination island, and press “Down” to confirm. Players will only take the gold coins and gems in their coin bags, so remember to fill your coin bag before leaving.
Dock Bell
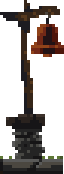
- The dock bell appears at the dock.
- After the boat is pushed next to the dock bell, the player can pay 2 gold coins to the dock bell, which will summon the 3 nearest workers and 3 nearest Knights/Squires and their squads (12 archers) to board the ship.
- If there are not enough residents of a certain type to fill the ship (for example, you only have 2 Squires), the existing ones will board. After you replenish personnel, you can ring the dock bell again to fill the vacancies (of course, you can also leave directly without filling up).
- Knights and Squires will bring all coins holding them, so it is recommended to fill their gold coins before you leave.
- The 4 archers on the boat’s watchtower will still attack any enemy in range, behaving the same as archers in towers. But they are also vulnerable to Floater attacks.
- Any other residents who have boarded will not attack, nor will they be targeted by any enemies.
Gem Keeper and Gem Box
- When the island’s base center is upgraded to a Stone Castle (Level 6), the Gem Box and Gem Keeper will appear at the dock in front of the dock bell.
- By paying gems to the Gem Box, players can store any number of gems to ensure their safety.
- When you have stored at least 1 gem in the Gem Box, a hooded NPC will appear next to the Gem Box during the day. Paying him 1 gold coin will retrieve 1 gem from the box.
- Gems can only be stored and retrieved one by one, but you can store or retrieve all gems by repeating payments.
- At night, if in an unsafe place (such as outside the wall), the Gem Keeper will disappear into blue flames to protect the gems from being snatched by monsters, until the monsters leave the next morning.
- The gems in the Gem Box are shared between all players and islands. This allows players to deposit or withdraw gems from any island they see fit.
System Analysis
Territory
- The area divided by walls on both sides is the territory. Except for teams led by archers and squires, others will always stay inside the walls. At night, archer and squire teams return inside the walls to meet the night attack. If the player issues orders such as chopping trees or collecting berries, farmers and workers will leave the wall regardless of day or night. Expanding territory can reduce the distance to the cave and dock portal, thereby avoiding conflicts between squire expedition teams and small monsters coming at night.
- Territory expansion also has some hidden costs. For example, the open space between walls will no longer generate wildlife for hunting. If destroying the two trees closest to the vagrant camp during wall expansion, the vagrant camp will disappear, losing the opportunity to recruit vagrants. Don’t bite off more than you can chew, so blind expansion is not advisable.
Economy System
- All expenses in the game require coins, and coins can be obtained by archers hunting wild animals and deer, and also by farmers planting crops and collecting berries in winter. Archers hunting in very wide fields can get more returns than farms, but sometimes limited by wildlife spawn rates, the income is not stable; while farms produce more stable and cyclically clear income than archers.
- During the day, Pikemen and Ninjas will wander and fish in the territory, but since Pikemen and Ninjas carry very few coins, sometimes players can easily miss some of the income they bring.
Decay
- After the player leaves the island, the development on the island will enter decay. If exceeding a certain number of days (greater than 50 days), some civilians on the whole island will lose their weapons and tools, and walls will be destroyed. Players returning to the island need to repair walls and restore civilian occupations. However, players can delay the decay time by increasing the number of walls or upgrading higher level walls and lighthouses. Higher level walls and lighthouses can buy players more than a hundred days of anti-decay time.
Mounts Explanation
Mounts have four basic attributes: Speed, Stamina, Recovery Method, Skill
| Attribute | Description |
|---|---|
| Speed | Speed when the mount runs (Double tap arrow key to run). Note that most mounts slow down in forest areas, except for a few. |
| Stamina | Time that running can last (Note that stamina after rest will be about 1.5 times that of starting directly). |
| Recovery Method | Most mounts eat grass (grass grows on the ground in non-forest areas outside the wall, mount will eat grass when stopping on grass). After resting, there will be white effects under the mount’s feet when moving, indicating that stamina is greater than standard value. Can rest again after the effect disappears. A few mounts have special recovery methods, which will be noted. Also, mounts can recover stamina even if not running (stopping or walking slowly), but very slowly. |
| Skill | Skills are divided into active skills (double tap shift to release) and passive skills (released automatically when conditions are met). Not all mounts have skills. |
Mounts - Kingdom Two Crowns (Main Game)
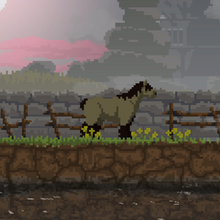
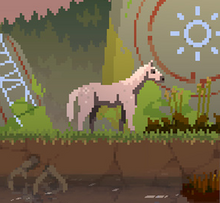
Horse
Initial horse, random horse pastures may be encountered in the wild, spend gold coins to sit on.
| Color | Speed | Stamina | Skill |
|---|---|---|---|
| Chestnut | Standard | Standard | None |
| White | Slightly Slow | Standard | Does not slow down in forest (Passive) |
| Black | Slightly Fast | Good | None |
| Piebald | Faster | Poor | None |
Griffin
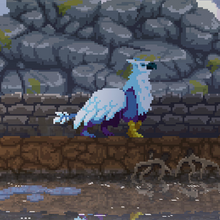
| Attribute | Description |
|---|---|
| Location | Island 1. Falls from the sky. |
| Cost | 2 Gems to unlock, 8 Gold Coins to sit on. (Usually don’t have gems when first encountering, sail to later islands to open purple chests to get gems, then sail back to unlock) |
| Speed | Faster |
| Stamina | Good |
| Recovery Method | Catches mice from the ground to eat. Can rest on any terrain, so very suitable for running maps. |
| Skill | Flaps wings, knocks back enemies in front (cannot hit air). Note that startup and recovery lag are long. |
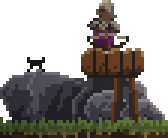
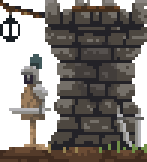
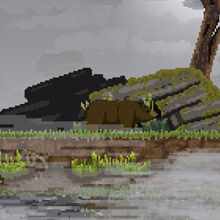
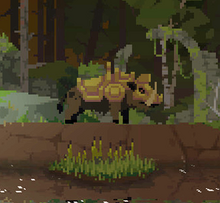
Stag
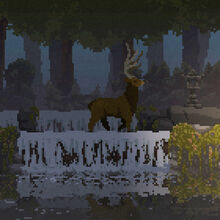
| Attribute | Description |
|---|---|
| Location | Island 2. A small waterfall as shown in the background can be seen in the forest. Unlock with gems at the stone lantern. |
| Cost | 1 Gem to unlock, 3 Gold Coins to sit on. |
| Speed | Faster, extremely fast in forest. Suitable for forest exploration. |
| Stamina | Poor, slightly increased in forest |
| Recovery Method | Eat grass. |
| Skill | Can attract deer in the forest (triggers automatically after approaching for two or three seconds, jumping hearts and sound effect), you can kidnap them home and kill them to make money. |
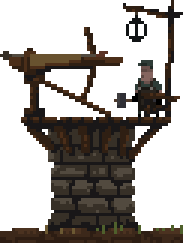
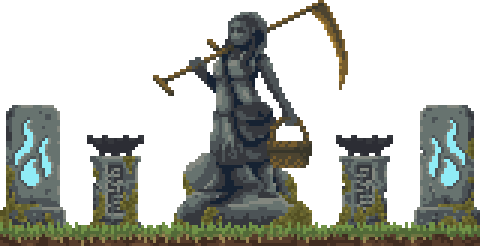
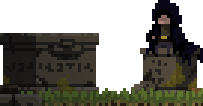
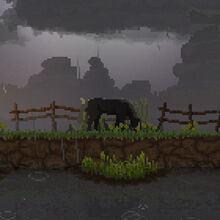
Warhorse
| Attribute | Description |
|---|---|
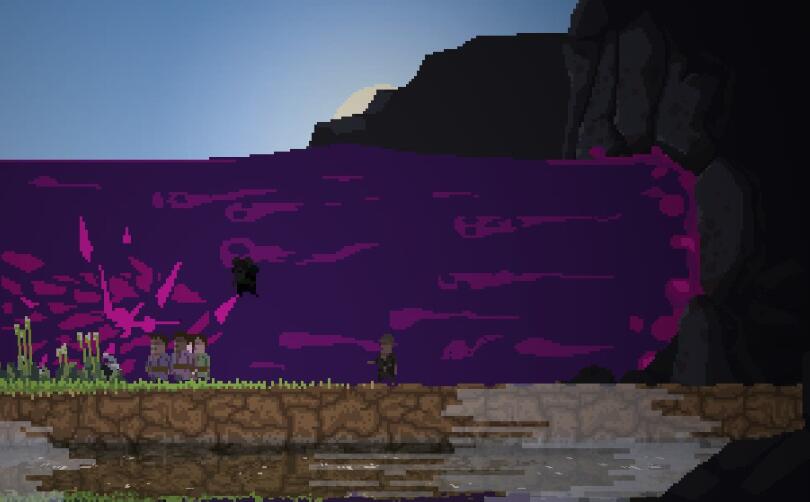
| Location | Island 2. A battlefield as shown in the background can be seen in the wild, with a tombstone next to it. Unlock with gems at the tombstone. |
| Cost | 2 Gems to unlock, 8 Gold Coins to sit on. |
| Speed | Slightly Slow |
| Stamina | Good |
| Recovery Method | Eat grass. |
| Skill | Makes nearby allies invincible for 10s. Does not work on players. |
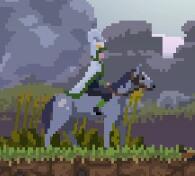
Wild Horse
| Attribute | Description |
|---|---|
| Location | Island 3. Visible at wild fence. |
| Cost | 1 Gem to unlock, 4 Gold Coins to sit on. |
| Speed | Slightly slow on plains, faster in forest. |
| Stamina | Has the highest stamina of all mounts. (This is exceedingly advantageous in winter when there is no grass to eat) |
| Recovery Method | Eat grass. |
| Skill | None |
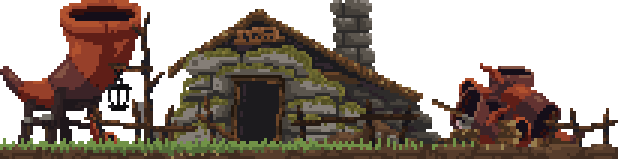
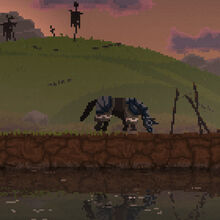
Bear
| Attribute | Description |
|---|---|
| Location | Island 3. A cave as shown in the background can be seen in the wild, with a yellow honeycomb on the tree next to the cave. Unlock with gems at the cave entrance. |
| Cost | 3 Gems to unlock, 11 Gold Coins to sit on. |
| Speed | Faster, slightly faster in forest |
| Stamina | Very poor |
| Recovery Method | Eat grass. |
| Skill | Pounces on creatures (rabbits, deer, small monsters) in front when running, can kill unarmored ones instantly (but most small monsters have masks, so can only be used for hunting, or hitting fleeing small monsters). Pouncing consumes stamina. Very fast for making money by hitting rabbits. |
Lizard
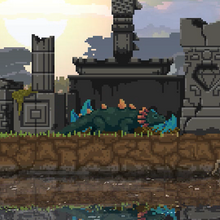
| Attribute | Description |
|---|---|
| Location | Island 4. An altar as shown in the background can be seen in the wild, unlock with gems at the altar. |
| Cost | 3 Gems to unlock, 10 Gold Coins to sit on. |
| Speed | Faster |
| Stamina | Very poor |
| Recovery Method | Sunbathing. Can only be done during the day. |
| Skill | Breaths fire forward, fire will ignite a small patch of ground in front for a while, igniting passing monsters, damage is considerable. Note that there is startup and recovery lag, and no control effect. Works very well with Griffin in co-op. |
Unicorn
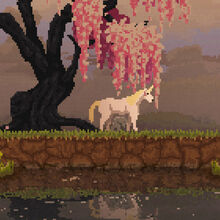
| Attribute | Description |
|---|---|
| Location | Island 5. Under the cherry tree in the wild. |
| Cost | 4 Gems to unlock, 12 Gold Coins to sit on. |
| Speed | Standard |
| Stamina | Standard |
| Recovery Method | Eat grass. |
| Skill | Eat grass, poop 3 gold coins. (Requires cooldown, unicorn will flash when cooldown is over) |
Mounts - Kingdom: Dead Lands
Skeleton Horse
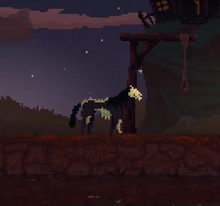
| Attribute | Description |
|---|---|
| Location | Initial horse |
| Speed | Standard |
| Stamina | Standard |
| Recovery Method | Eat grass |
| Skill | None |
Gamigin
| Attribute | Description |
|---|---|
| Location | Island 1. |
| Cost | 1 Gem to unlock, 3 Gold Coins to sit on. |
| Speed | Slower |
| Stamina | Poorer |
| Recovery Method | Eat dirt, can eat on any terrain |
| Skill | Charge attack, damage up to three small monsters at a time |
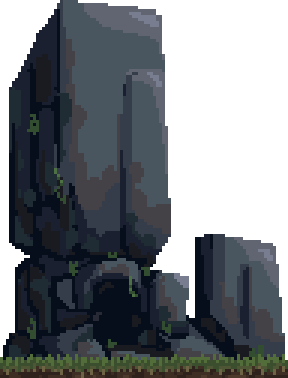
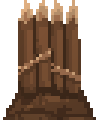
Golem (Skeleton Tree)
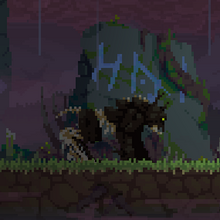
| Attribute | Description |
|---|---|
| Location | Island 3. Wild, unlock background is huge stone tablets. |
| Cost | 2 Gems to unlock, 12 Gold Coins to sit on. |
| Speed | Slightly Slow |
| Stamina | Slightly Low |
| Recovery Method | Grass. Eats flowers on hand, needs to eat two. |
| Skill | Summons vines to block monsters, vine health is about equal to Level 1 wall, max 3 exist at same time. |
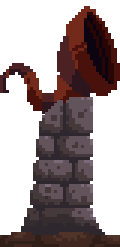
Beetle

| Attribute | Description |
|---|---|
| Location | Island 4. Wild, background is huge tree stump. |
| Cost | 2 Gems to unlock, 10 Gold Coins to sit on. |
| Speed | Standard, but increases in forest. |
| Stamina | Higher |
| Recovery Method | Grass. Eat bugs |
| Skill | Exploding eggs. Press shift when moving to lay an egg patch behind. Eggs explode when monsters approach, causing area damage, can insta-kill small monsters. |
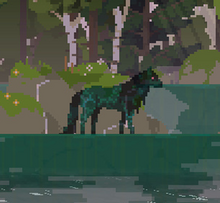
Black Unicorn
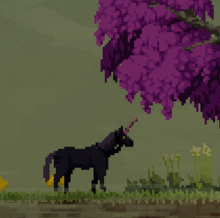
| Attribute | Description |
|---|---|
| Location | Island 5. Unlock under cherry tree. |
| Cost | 6 Gold Coins to unlock, 12 Gold Coins to sit on. |
| Speed | Standard |
| Stamina | Standard |
| Recovery Method | Eat grass, but can eat anywhere. |
| Skill | Eat grass, poop 3 gold coins. (Requires cooldown, black unicorn will flash when cooldown is over) |
Mounts - Kingdom: Norse Lands
Day/Night Horse
| Attribute | Description |
|---|---|
| Location | Island 1. Unlock at Sun/Moon Monolith |
| Cost | 1 Gem to unlock, 4 Gold Coins to sit on. |
| Speed | Standard. But faster at dawn and dusk. |
| Stamina | Standard |
| Recovery Method | None |
| Skill | Color changes with day and night. |
Reindeer
Island 2 Unlock. Same as Stag in main game except for appearance
Cat Chariot
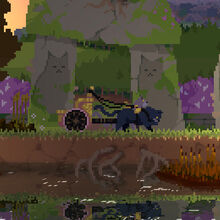
| Attribute | Description |
|---|---|
| Location | Island 2. Unlock at Cat Stone Gate. |
| Cost | 3 Gems to unlock, 7 Gold Coins to sit on. |
| Speed | Extremely high on plains, but very slow in forest |
| Stamina | Low |
| Recovery Method | No terrain limit. Eat mice. |
| Skill | Can use Cat Chariot to attract cats in forest inside walls. Bringing cats to farms lets them catch mice, each mouse gives 1 gold coin. Also unlocks achievement. |
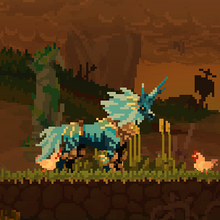
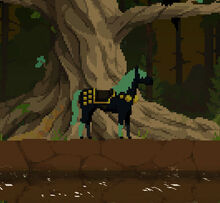
Sleipnir
| Attribute | Description |
|---|---|
| Location | Island 3. Unlock under a big tree in the woods. |
| Cost | 3 Gems to unlock, 12 Gold Coins to sit on. |
| Speed | Fast |
| Stamina | High |
| Recovery Method | Eat grass. |
| Skill | Leave flames behind after dashing. (Active skill) |
Kelpie
| Attribute | Description |
|---|---|
| Location | Island 4. Unlock in the middle of a large pool. |
| Cost | 3 Gems to unlock, 10 Gold Coins to sit on. |
| Speed | Standard |
| Stamina | Stronger |
| Recovery Method | No terrain limit. Drink water. |
| Skill | Wave (Active): Knock back enemies in front, and briefly stun small monsters. Ice Wall (Active): Skill becomes releasing ice wall in winter. Max 3 walls exist at same time. |
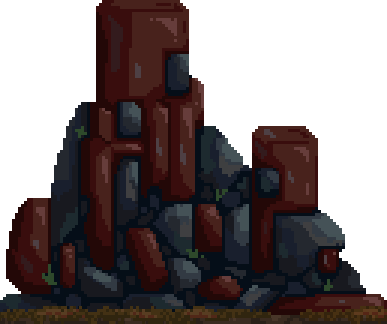
Gullinbursti (Gold Burst)
| Attribute | Description |
|---|---|
| Location | Island 5. Under a huge stone tablet. |
| Cost | 3 Gems to unlock, 12 Gold Coins to sit on. |
| Speed | Slower |
| Stamina | Very high |
| Recovery Method | Any scene. Dig ground |
| Skill | Dig ground: Chance to dig out 3 gold coins when digging. Digging on farm can immediately grow crops to next stage (ripe ones won’t continue growing). |
Fenrir
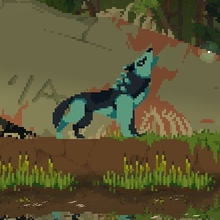
| Attribute | Description |
|---|---|
| Location | Island 6. On a huge fallen stone pillar. |
| Cost | 3 Gems to unlock, 10 Gold Coins to sit on. |
| Speed | Slightly fast |
| Stamina | Standard |
| Recovery Method | Absorb moonlight at night. |
| Skill | Pounce forward and bite three times, making surrounding soldiers invincible for 3s. |
Walkthrough
Campaign Speedrun Strategy
Island Order: 1-2-1-3-4-5-123
| Order | Description |
|---|---|
| Island 1 | Only light the campfire to build hammers and archers, then go to both sides to find all gold coin chests, then build a boat to go to Island 2. Ringing the bell is optional. |
| Island 2 | Still only light the campfire to build hammers and archers, light the statue, unlock stone and boat building, unlocking hermit is optional. |
| Island 1 | Return to Island 1 after building the boat, light the statue, build level 2 walls, hire some archers, make money to build boat to go to Island 3. |
| Island 3 | Decide development degree based on stay time on previous islands. Go to Island 4 after unlocking Baker. |
| Island 4 | Unlock iron mine, upgrade main city and prepare two teams of knights on the cave side, then blow up the cave. |
| Island 5 | Continue repeating Island 4 steps, then Island 123. Campaign cleared. |
Strategy Analysis
- Since Island 1 has no stone and mines, there is no need to stay and develop on Island 1. Moreover, chests on the island can provide boat building fees, so Island 1 does not need long-term development, simply build a boat and go to Island 2 directly.
- Island 2 has stone but still cannot reach the mine required to unlock bombs, so there is no need to stay on Island 2 either. If you stay on Island 1 for more than 3 days, you may encounter small monsters on Island 2, you can bribe small monsters by dropping coins.
- The reason for returning to Island 1 is that the Archer Statue on Island 1 will qualitatively improve the comprehensive combat effectiveness of archers. However, there is still no need to stay long on Island 1. Hiring 6-8 archers and level 2 walls meets the needs of night defense and daytime hunting.
- Make sure to unlock the Baker on Island 3, because the distance between the two sides is very far on Island 4 and 5, and vagrant tents are also behind the portal. Otherwise, staying too long just to recruit vagrants is very unfavorable for Island 5 and subsequent games.
- Island 4 is crucial. Save two teams to blow up the cave after unlocking mines. But don’t be too hasty, be sure to push down the portal on the cave side before advancing. Knight upgrades are not very necessary in my opinion, firepower output is concentrated on archers rather than squires acting as meat shields in the front row, not to mention dropping coins can also continuously transfuse for squires so they don’t lose armor.
- Island 5 is relatively difficult because winter is approaching after passing the previous islands. Therefore, we need to fight steadily. Don’t clear trees too far so that berry bushes spawn too far away. Once you encounter a berry bush nearby, build a wall in front to protect farmers’ gathering operations.
- After taking down Island 5, it will be relatively easy. Go back to whichever Island 123 has development and more manpower, so you can use existing development advantages to destroy caves quickly before decay.
- Hermits and mounts do not necessarily need to be all unlocked. Personally, I only unlocked Stags and Lizards for clearance, and only Baker for hermits.
- Do not stay too long on Island 123, otherwise the longer the time, the more unfavorable for subsequent defense.
Reference
- Steam - Kingdom Two Crowns
- Steam 社群 :: 指南 :: 【王國:雙冠】 入門、進階、通關 全攻略
- Steam 社群 :: 指南 :: A Complete Guide to “Kingdom: Two Crowns” (Community Collab)
- Steam 社群 :: 指南 :: 【王国:两位君主】坐骑介绍
Recommended Videos
- Kingdom Two Crowns: Skull Island Speedrun 43:53 - 11 Days - YouTube
- Plague Island Cursed Crown after the Conquest Update | Kingdom Shogun - YouTube
- Kingdom Two Crowns: Shogun - 100% - CURSED Diffculty - no comments #4 - YouTube
- Kingdom Two Crowns Longplay 🏰 Reconquering the Realm 💰 Fighting the Greed (No Commentary 🙊) - YouTube
- I Played 100 Days Of Kingdom Two Crowns - YouTube
- Kingdom Two Crowns: Dire Island Challenge (Cursed Crown) 22 Days - YouTube